A lovely new friend I met in the blog-o-sphere asked me yesterday how she could get started with Aquaponics. She cited cost as an issue that was stopping her from doing what I’ve done with my garden. I felt like slapping my forehead. The POINT of me sharing my garden with you was to encourage all of you to do the same thing but somehow I totally didn’t take into account that not everyone has access to the same supplies and money we do (thanks to the tax return, actually…). So I wanted to write up a post with several ideas of how to get your own garden started without putting in the same cost that you see on my blog.
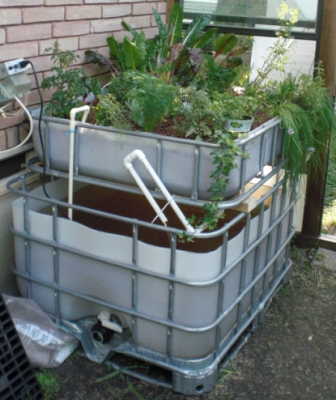
To start with, lets talk fish containers. I purchased an IBC that costs around $175, depending on the seller, condition, delivery,etc. Other options are real fish tanks, storage totes, horse troughs (the heavy metal ones), pond liners and even a wooden frame with a heavy plastic liner inside of it. If you manage to find one, old bath tubs would be great too!

Grow beds can be as simple as PVC pipes, storage totes, wooden box with plastic liner, or cut IBCs. You don’t even have to use rock as your grow medium.

You can get a piece of thick styrofoam, cut circles and slide baskets in to hold your plants. This would then float on top of a water bed. This cuts down significantly on cost as you don’t even have to worry about buying rock at all!

The plumbing is not as negotiable, you really do need to have PVC. But its not usually all that expensive and often times you can find it on Craigslist or friends have leftover pieces hanging around. You do not have to use Tilapia. Pretty much any fish will work (even shrimp!). If you are trying to go as inexpensive as possible, go to a local pond and snag a few fish to toss into your tank. If that isn’t an option, get feeder fish from your local pet store and use them. I’ve seen people using koi, beta, and gold fish. As for plants, you can buy seed packets and start from scratch, you can replant the ends of vegetables (celery would do this well!) and you can even get trimmings off other plants in your yard. Aquaponics can be as simple as recycling old objects to as complicated as whole warehouse systems with rotating beds and grow lights. You can put a tiny system on your kitchen counter, a small system in an extra bedroom, a moderate system in your basement, a huge system in your back yard! You can choose to plant a simple herb garden for fresh herbs year round or you can plant a system that will feed your entire family or you can develop a system that will produce enough to participate at a local farmer’s market. A day dream that I’ve been working on lately is a website that will teach people more about aquaponics and point people in the direction of where to go to buy all the components for a great system. I’ll let you all know when that site launches, its actually in the works and I can announce it formally in the next few months! Keep watching for it!
Update (June 1, 2015): My Website is up and running with several good DIY guides! You can find my site at www.aquaponicsresource.com. Enjoy looking around at everything I created!


